Invitations
Invite team members by email and track the status of every invitation.
Sending an Invitation
Owners and Admins can invite new team members from Settings → Team.
- Click + Invite member
- Enter their full name and email address
- Select a role (Author, Admin, Billing, Viewer, or Owner)
- Click Invite
The invitee receives an email with a link to accept the invitation and create their account. The invitation link is valid for 7 days.
Invitation Statuses
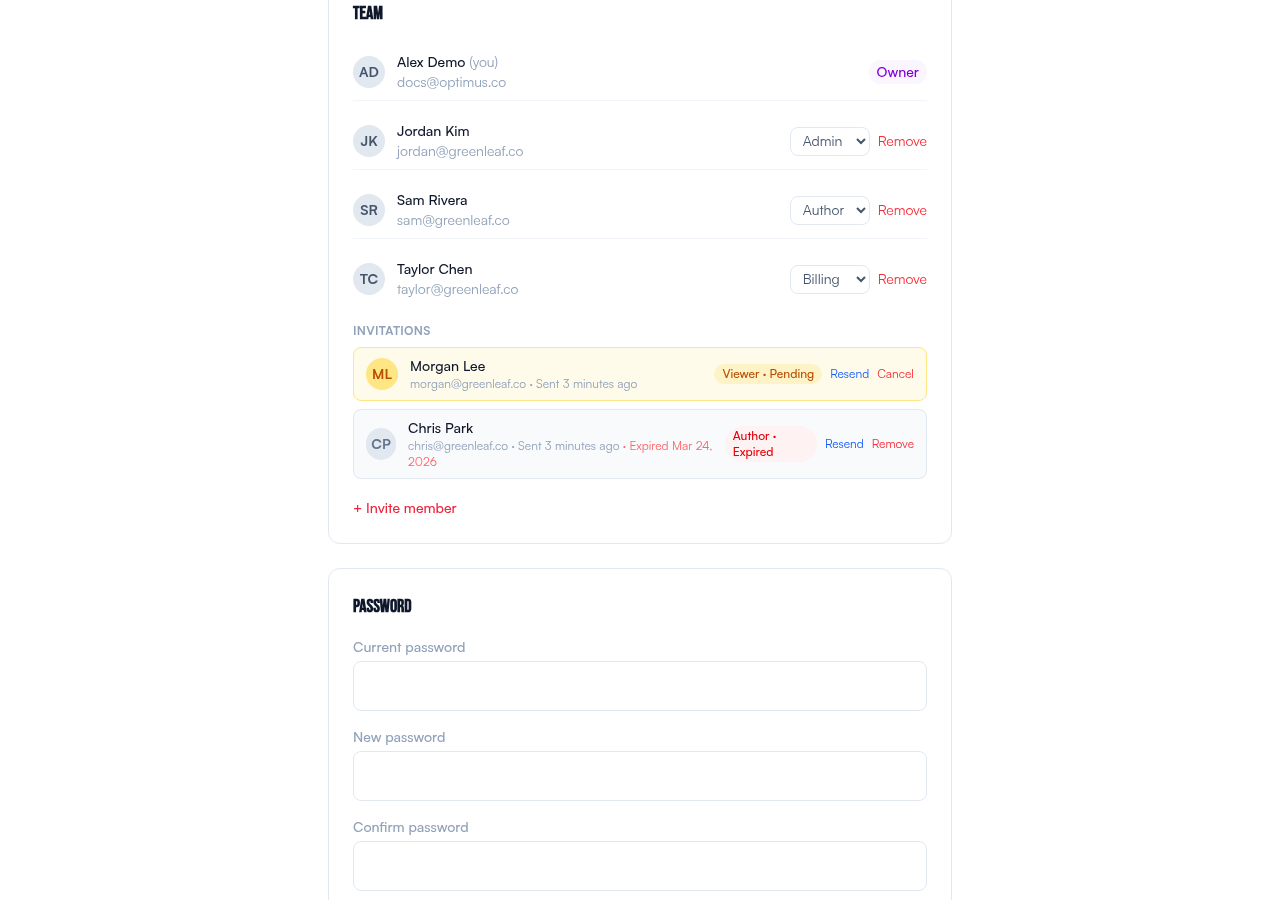
| Status | Meaning | Actions |
|---|---|---|
| Pending | Invitation sent, not yet accepted. Link is active. | Resend, Cancel |
| Expired | 7-day window passed without acceptance. | Resend (refreshes expiry), Remove |
| Accepted | User created their account. Invitation no longer shown — they appear as a team member. | — |
Resending an Invitation
Click Resend to send a fresh email and reset the 7-day expiry. This works on both pending and expired invitations.
Cancelling an Invitation
Click Cancel (or Remove for expired invitations) to permanently delete the invitation. The link in the email will no longer work — the invitee will see an "Invitation Not Found" page if they click it.
What the Invitee Sees
When someone clicks the invitation link in their email, they see a branded signup page with:
- Who invited them and to which organization
- Their assigned role
- Their email (pre-filled, cannot be changed)
- Name and password fields to complete their account
After accepting, they're immediately logged in and taken to the dashboard.
Duplicate Prevention
You cannot send two active invitations to the same email address. If you need to change the role on a pending invitation, cancel it first, then send a new one.
If someone with the invited email already has an Blendo account, the invitation will be rejected — they would need to be added to your account through a different mechanism.